
iOS
Scanning App
For your convenience, we have developed a dedicated TCRM Scan mobile application for access control and ticket scanning using your smartphone camera.
The application is available for iOS and Android. It needs an internet connection: every ticket is checked in the system at the moment it is scanned.
Download the app
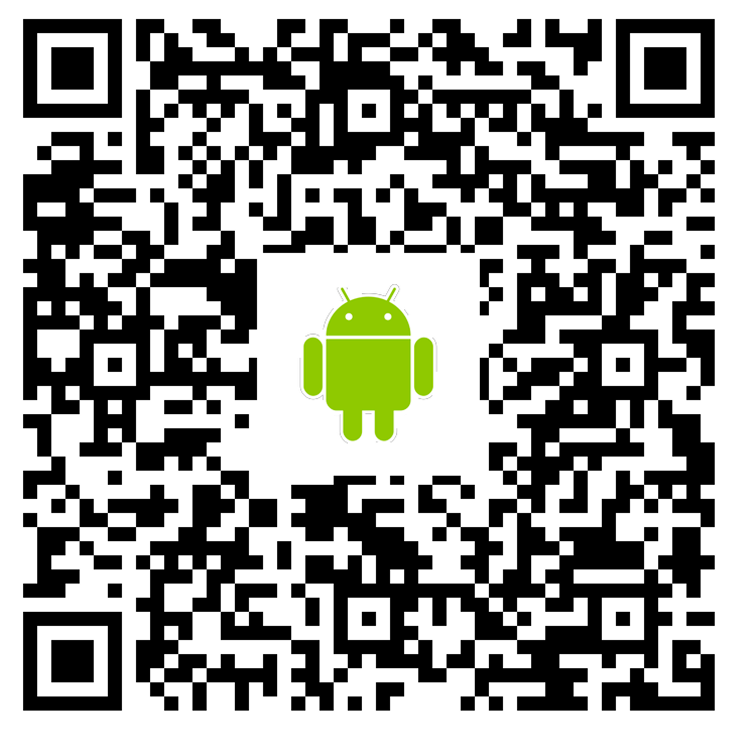
Section titled “Download the app”You can open the appropriate store using the link or scan the QR code below depending on your smartphone’s operating system.

Android
How to use the app
Section titled “How to use the app”1. Sign in
Section titled “1. Sign in”Open the app, tap Start and sign in with the email and password of your TicketCRM access control manager account.
The sign-in screen shows the current store — the ticketing system the app connects to. If it is not the right one, tap the settings icon in the top right corner and choose the correct Store address. You can change the app language there as well.
If your account has access to several companies, the Companies list opens after you sign in — pick the one you need.
2. Select an event
Section titled “2. Select an event”The List of events shows the events where you have access control. Find the event by name and tap it. Pull the list down to refresh it.
Each event card shows the venue, the start date and time, and:
- Scanned — how many tickets for the event have already been scanned;
- Total — how many tickets for the event have been sold.
3. Select an entry point
Section titled “3. Select an entry point”If you have access to several entry points of the event, the Control points list opens — choose the one where you are working. If there is only one, the scanning screen opens right away. The name of the selected entry point is shown under the Scanning title.
The message No active entry points means you have no access to any entry point of this event. Contact the organizer.
4. Allow camera access
Section titled “4. Allow camera access”When scanning is opened for the first time, the app asks for permission to use your smartphone camera. Allow it — tickets cannot be scanned without the camera. If you declined, the screen shows Allow camera access: turn on camera access for TCRM Scan in your phone settings.
5. Scan a ticket
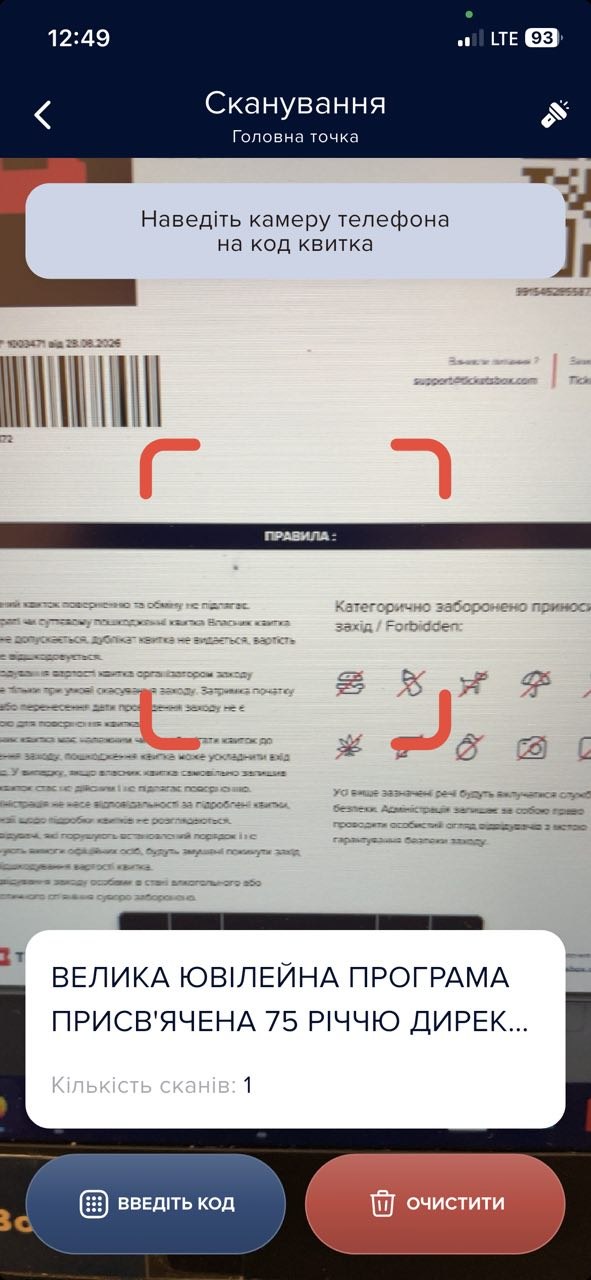
Section titled “5. Scan a ticket”Point the smartphone camera at the ticket so that its QR code or barcode is inside the red frame on the screen. The app recognizes the code, checks the ticket and shows the result as a coloured banner at the top of the screen, with a sound and a vibration. See Scan results for what each banner means.
Below the frame there is the event card:
- Ticket — the sector, row and place of the last successfully scanned ticket;
- Number of scans — how many tickets for this event you have successfully scanned from this phone.
Buttons at the bottom of the screen:
- Enter the code — type the ticket number by hand if the code is damaged or the camera cannot read it.
- Clear — removes the result from the screen and turns scanning back on after an error.
In a dark room, turn on the flashlight with the button in the top right corner. While the scanning screen is open, the phone screen does not turn off.
6. Review the scan history
Section titled “6. Review the scan history”Tap the event card above the buttons at the bottom of the scanning screen to open the scan history for that event.
The history lists all your scans of this event from this phone, newest first. Each record shows:
- the ticket barcode;
- the date and time of the scan;
- the result: Successfully (a green record) or the reason for the refusal (a red record) — for example, an incorrect barcode or a repeated scan with when, where and by whom the ticket was already scanned.
Find a ticket with the Search by barcode field. Tap a record to copy its barcode.
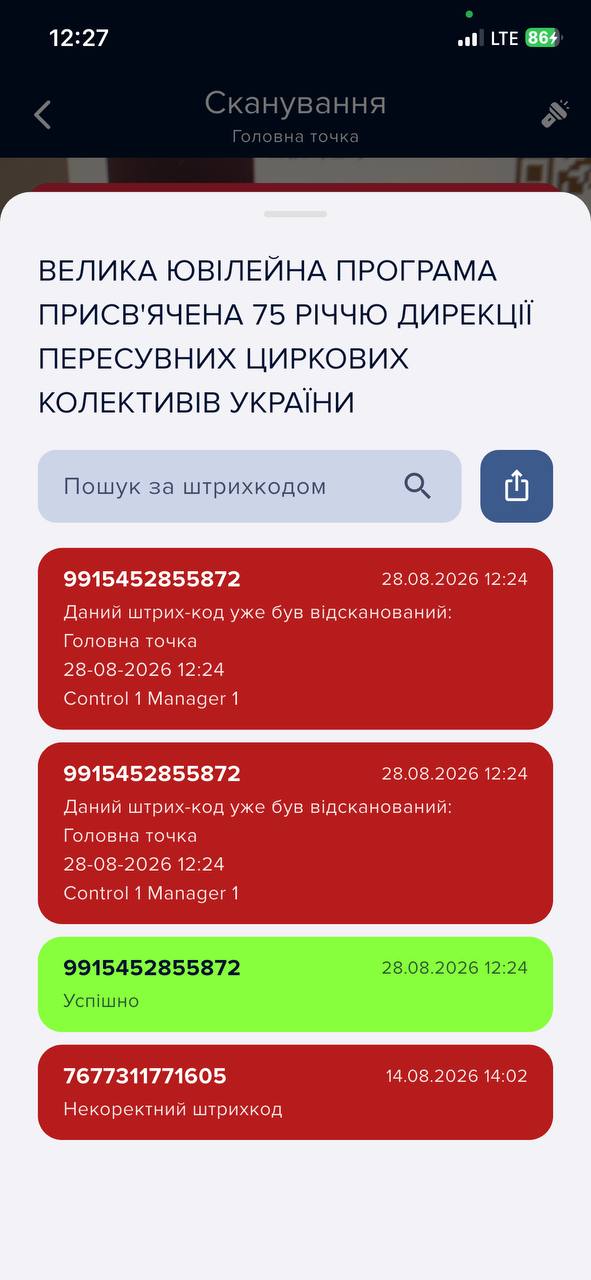
The button next to the search exports the history to a CSV file — you can send it to a messenger or by email, or save it on the phone.
Scan results
Section titled “Scan results”After every scan, a banner with the result appears at the top of the screen.
-
Let the guest in
The ticket is valid and is now marked as used. The event card shows its sector, row and place, and Number of scans goes up by 1. You can scan the next ticket right away.
-
Do not let the guest in
Someone has already entered with this ticket. The banner shows when, by whom and at which entry point it was scanned — enough to sort the situation out on the spot.
-
Do not let the guest in
There is no such ticket among the tickets for this event: for example, it is a ticket for another event, or the code was misread. Scan it again or type the number with Enter the code.
If the red banner says Failed to scan ticket, check your internet connection and scan the ticket again.
Additional settings
Section titled “Additional settings”To open the menu, tap the ☰ icon in the top right corner of the event list (it is also on the company and entry point screens). The top of the menu shows your name and the Logout button, the settings are below.
Store address and language
Section titled “Store address and language”- Store address — the ticketing system the app connects to. It can only be changed before you sign in: if you need another store, tap Logout first.
- Language — the interface language: УКР, РУС or EN. Until you pick one, the app follows the phone language.
Show the hall
Section titled “Show the hall”The Show the hall option adds the name of the hall where the event takes place to the event card in the event list.
This is useful when several events are taking place simultaneously in different halls at the same venue.
Scanner
Section titled “Scanner”The Scanner option is available on Android only. It turns on the built-in scanner of a data collection terminal (PDA) — a device with a hardware scan button.
In this mode the camera is not used:
- tickets are scanned with the terminal’s button;
- the screen shows the list of recent scans with their results, newest first;
- there is no Clear button: after an error you can scan the next ticket right away;
- Enter the code works as usual, and the number of successful scans is shown at the bottom;
- tap the event name at the top of the screen to open the scan history.
The Scan by button option has no effect in this mode.
Scan by button
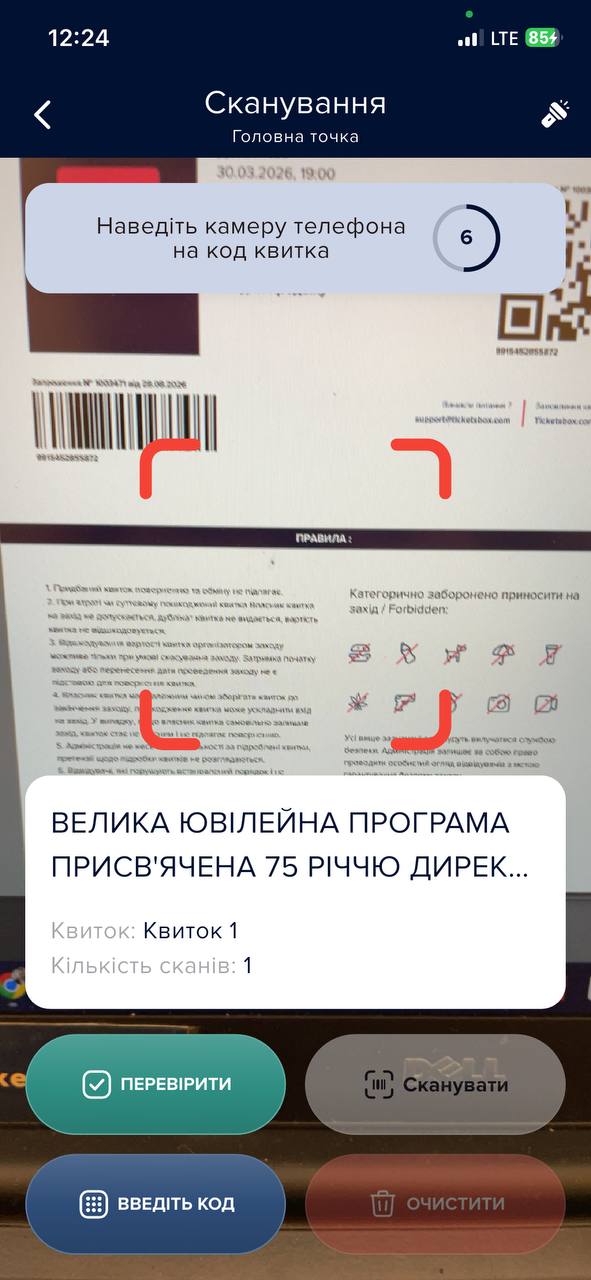
Section titled “Scan by button”The Scan by button option controls how tickets are scanned with the smartphone camera.
- When disabled, tickets are scanned automatically as soon as the QR code or barcode enters the frame.
- When enabled, a Scan button appears on the screen. Tap it and point the camera at the code: you have 10 seconds, and the countdown is shown on the hint at the top. One tap scans one ticket. While the countdown runs, the Scan and Clear buttons are inactive.
Ticket validation
Section titled “Ticket validation”The Ticket validation option adds a Validate ticket button to the scanning screen (in Scan by button mode it is shorter — Validate — and sits next to Scan). Validation shows the ticket status without marking the ticket as used: it does not let the guest in. It is handy when you need to sort out a disputed ticket.
To validate a ticket:
- Tap Validate ticket — the button turns yellow and the hint at the top changes to “Point the camera at the ticket code to validate”.
- Point the camera at the code, or type the number with Enter the code.
- Read the result on the banner marked Ticket validation.
Validation works once: after the result the button switches off, and the next scan is a regular one. In automatic mode the result stays on the screen until you tap Clear, so the same ticket is not scanned by accident right after the check. Validation results are not added to the scan history.
-
The ticket can be used
The ticket is valid and has not been used yet. Validation did not mark it — to let the guest in, scan the ticket in regular mode.
-
The ticket has already been used
Someone has already entered with this ticket. The banner shows when, by whom and at which entry point it was scanned.
-
Do not let the guest in
The ticket was not found or is not valid.
-
Do not let the guest in
The season ticket is valid, but the holder has not booked this session, and Last minute does not let them in without a booking. See Session booking.
-
Do not let the guest in yet
The season ticket has no booking, and the Last minute window has not opened yet. The holder can get in closer to the start of the session if seats are still free. See Last minute.
-
Do not let the guest in
The session the ticket was issued for has already ended.
If you see Unknown status, update the app to the latest version.
Choose company
Section titled “Choose company”If your account has access to several companies, the menu has a Choose company item — it takes you back to the company list so you can switch to another one.